AI Classroom Visuals: An Introduction to AI Image Generators
- Julia Morris
- Sep 13, 2023
- 10 min read

Introduction
In this blog post, I'll explore the topic of AI-generated art, discussing its varied applications and guiding you on how to begin crafting these images using different platforms. I'll provide side-by-side comparisons from four AI generation websites using the same prompt, offering insights into their relative quality. For those who'd rather watch than read, there's a video on this topic available here.
Much like the advancements in AI text generation, the world of AI imagery has experienced a significant boost in quality and user-friendliness over the past year. Numerous platforms now allow users to create a vast array of images simply from a text prompt. These AI-generated images are becoming so realistic that often, the only giveaway is their perfection!
Similar to text-based AI, AI art isn't without its share of debate. Many people have concerns over these platforms training on artworks found online without the explicit consent of the original artists and these platforms are excellent at mimicking the styles of artists, both past and present.
How about a Labrador in the style of Van Gogh or Da Vinici?


This has understandably angered many artists as it is now incredibly easy to generate new images in their style and most platforms come with a commercial license, meaning that you can sell, print or copy the images to your hearts content.
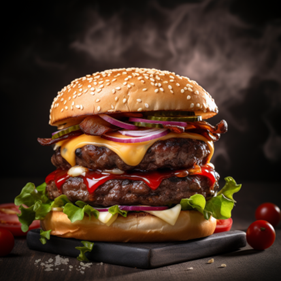
Many commercial photographers and models are also starting to get worried about their jobs. Why would companies pay for a food photographer if AI can produce this?
In light of these advancements, many artists are understandably upset. With just a few clicks, it's now incredibly easy to generate new images mirroring their unique style. What adds fuel to the fire is that most of these platforms offer a commercial license. This means that users can freely sell, print, or replicate the AI-generated artworks, capitalizing on styles that took artists years, if not decades, to develop.
But the wave of concern isn't limited to just traditional artists. Commercial photographers and models are also feeling the heat. As AI continues to improve its image generation capabilities, why would businesses hire a hire a photographer, if AI can produce this?

Another layer to the copyright issue is a recent decision by the U.S. Supreme Court. They've declared that art produced by AI cannot be copyrighted unless it's undergone significant human modifications. This means that while you can sell your AI-produced images, it's technically possible for others to replicate and sell those same images. On the other hand, the EU has tighter regulations. There, even AI creations without human intervention can be protected under copyright laws.
Yet, despite these copyright issues, AI-generated images can be an excellent tool for educators, allowing them to create unique worksheets, presentations, and classroom displays. Plus, they offer an opportunity to collaborate creatively with students. More on these use cases will be discussed below.
Using AI generators
Before we look into examples of AI images suitable for lessons, it's worth taking a moment to review some of the most popular platforms out there. I'll be highlighting four in particular: Midjourney, Canva, Dall-e 2, and Leonardo AI.
Midjourney stands out as the top choice, with both the best in quality and the most popular. However, its premium status is reflected in its pricing. The free trial period is no longer available, and the starting subscription rate is $10 a month. Another potential inconvenience is that it requires users to operate the generator via Discord, a well-known chat platform. But if you have larger image projects in mind or plan to use it frequently, the subscription is definitely worth considering.
On the other hand, the trio of Dalle, Canva, and Leonardo AI currently offer their services for free, but all have a daily limit on the number of images you can produce. Their outputs can occasionally be hit-or-miss, especially when generating human images—sometimes you'll end up with extra arms or a missing face! Of the three, Leonardo AI stands out in terms of quality, coming in second after Midjourney. However, its website, has many options and generator models, can be a bit daunting for newcomers. Fortunately, there's a good number of beginner tutorials available online to help you get started.
Midjourney
To get an insight into the kind of prompts you might use, I recommend checking out the gallery here. By clicking on any image within, you can view the specific prompt that led to its creation. This can serve as a valuable source of inspiration, giving you ideas on various styles to experiment with.

To create you own, here is the official Midjourney guide for beginners: Midjourney Quick Start Guide.
Here are the main points:
1. Sign up: Start on www.midjourney.com/ and click "Join the Beta". You will be invited to join the discord server. At this point, you will need to create a Discord and a Midjourney account and subscritption.
2. Prompt Creation: Begin in one of the "Newbies" rooms on the Midjourney server. In the text box, type “/image” followed by your desired prompt. A good strategy is to start by specifying the kind of image you want (photo, oil painting, origami model, etc.), followed by the subject. Examples include "a photo of an elephant", "a paper cutout of a man in a brown suit", or "an illustration of a flying pig soaring above a world made of cotton candy"
3. Generation: After hitting enter, the platform will generate four preview images.
4. Modification Options:
Click U1/U2/U3/U4 to upscale any of the four images and create a full sized version.
Click V1-4 if you wish to create a variation of a particular image.
Use the circle of arrows icon if you want to generate four new images entirely.
The blue arrow icons let you expand the image in any direction. It's usually more effective to modify your prompt to specify what you'd like in the expanded area. E.g. if your main image is of a woman walking down a road, and you want more background, change the panning prompt to "an street" or "a row of houses" otherwise it will add another woman to your image.
5. Saving Your Creation: To save the image you’ve crafted, click on it, select "open in browser", and then right-click to choose "save as".
6. Navigation Tip: While starting in the Midjourney server is advised, be mindful that your creations can get mixed up with others'. To avoid this, it's a good practice to create your own private space for a more personalized experience.
These instructions on how to do that were adapted from How to Geek.
1. Open Discord.
2. On the very left hand, click the plus to create your own server. Use the option “for me and my friends” and give it a name. You don’t need to invite anyone else.
3. Go to Midjourney's server by clicking the sailing boat icon on the left hand side.
4. Click any of the "Newcomer Rooms" on the left panel.
5. You will see many posts created by the Midjourney Bot. Click one of its names, "Midjourney Bot," or the " profile picture."
6. Click "Add to Server. "
7. Choose the server where you want to add the Midjourney bot.
8. Click "Continue."
9. Click "Authorize."
10. You can now go back into your own server and start creating by typing /image followed by your text prompt.
Leonardo AI
This is what the website guide says: “To access Leonardo.Ai simply sign up by visiting our landing page and clicking on the ‘Create an account‘ or ‘Start using Leonardo‘ button. If this is your first time signing up, you can enter your first name and email and click the ‘Count me in’ button to be added to the early access waiting list. However, if you’ve already been granted access, you can click the ‘Yes, I’m whitelisted’ button which will take you to the web-app login.”
Once you are in, you need to chose one of the models, read the description and choose the one that matches most closely your use case, e.g. if you want to generate a photo, use “PhotoReal” or if you want to create an illustration, use “Illustration V2”. You should then be taken to the creation window where you can put in your text prompt, e.g. a simple illustration of a cute cat with white background, and click generate or play around with the options.
taken to the creation window where you can put in your text prompt, e.g. a simple illustration of a cute cat with white background, and click generate or play around with the options.
ChatGPT The website guide for Leonardo.Ai outlines the following steps to get started with their platform:
Sign Up
Visit Leonardo.Ai's landing page.
Click on the 'Create an account' or 'Start using Leonardo' button.
For first-time users: Enter your first name and email, then click 'Count me in' to join the early access waiting list.
For those with access already: Click the 'Yes, I’m whitelisted' button, which will direct you to the web-app login.
Model Selection:
Once logged in, you'll need to select a model.
Go through the descriptions and pick the one that aligns best with your intended use. For instance:
For photo generation, opt for "PhotoReal".
For illustrations, choose "Illustration V2".
Creating Your Image:
You'll be directed to the creation window.
Input your text prompt here. For example, you could specify "a simple illustration of a cute cat with a white background".
Click 'generate' or experiment with the available options to fine-tune your output.Remember to always read the model descriptions to make sure you're using the one best suited to your needs.
Dall-e 2
Dall-e2 is part of openai, just like ChatGPT. Start here https://openai.com/dall-e-2 click “Try Dall-e 2” and then enter your text prompt. Like on the other websites, you get four preview images and you can click any of them to make variations or to save them. Like in midjourney, you can extend the picture by using the “generation frame” icon and moving it in any direction. The fun element here is that you can upload an existing image and extend it this way.
Dall-e2 is a product of OpenAI, just like ChatGPT. To begin your work with Dall-e2, visit the website and click on "Try Dall-e 2." Input your text prompt, and similar to other platforms, you'll be presented with four preview images. You can select any of these previews to explore variations or to save your preferred choice. Dall-e2 also offers a unique feature, where you can enlarge or adjust the image using the "generation frame" icon. What makes Dall-e2 especially interesting is its ability to upload an existing image and seamlessly extend or modify it. Additionally, for those who prefer, Dall-e2 can also be accessed via Bing chat. Simply ask it "Create an image of...", ignore the text answer it gives you, and wait a few seconds for it to produce the image. Bing Chat is a great way of combining text and image generation, you for example you could ask for ideas for a story and then generate the pictures to go with it without having to change platforms.
Canva
Canva is popular among teachers as a image editing and presentation tool, and as a contemporary alternative to PowerPoint. Teachers can get a free premium education account, provided they can verify their employment at a school. This premium status is essential to access Canva's AI functionalities.
To start with Canva:
Initiate a New Design: Go to Canva.com and sign up for an account. Applying for a free teacher account might take a bit longer and can be done here. Once you have your account, start by creating a fresh design, such as an empty presentation.
Navigate to the AI Tool:
Click on the "Apps" option located on the left sidebar.
Search for "text to image" within the apps.
Launch the app and input your desired prompt.
While Canva offers the ability to generate images through AI, its strong point lies in image editing. Here's a quick tip:
Edit Images:
Select any image within your presentation, regardless of whether it's AI-generated or not.
Click on "edit photo".
Use the "magic eraser" tool to effortlessly remove unwanted elements.
For more advanced modifications, opt for the "magic edit" feature. Now we can have party hat on a cat without animal cruelty!

Use cases for teachers
Everyone loves a sticker – even older students are often quite pleased to get one as a reward for good work and with the advent of AI, creating custom sticker designs has never been easier.
Generate Your Designs: Use AI platforms to create your desired images.
Refine and Customize
Import these images into Canva or PowerPoint.
Add personal touches like text or decorative frames to enhance their look.
Printing Process:
Purchase print-at-home sticker paper, suitable for standard printers.
These sheets typically come with user-friendly templates or guidelines, ensuring that your designs align perfectly with the sticker's shape, be it round or square.
You can also upload them on one of the many professional sticker printing websites but they tend to be a lot more expensive, especially if you only want to create smaller batches.
Prompt: Sticker of an ice-cream
Midjourney

Canva

Dall-e 2

Leonardo AI (model Illustration V2)


Other stickers created in Midjourney (and edited in PowerPoint)


How many hours have you spent trying to find the best clipart or photo for your presentations, worksheets and flashcards? And how often have you ended up with a paywall or a watermark? Well now, you can make your own!
Prompt: Clipart of a Rose
Midjourney

Canva

Dalle-2

Leonardo AI (model Illustration V2)

Other examples created in Midjourney


Prompt: Photo of a horse, white background
Midjourney
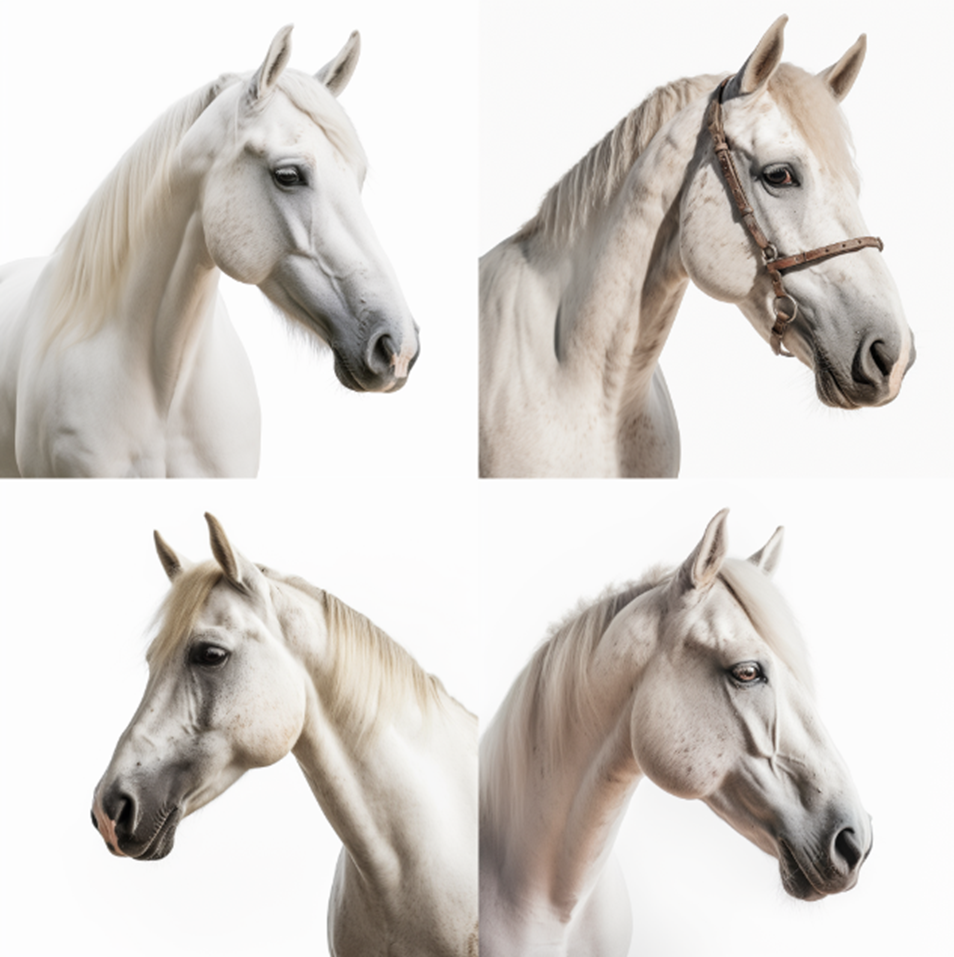
Canva

Dalle-2

Leonardo AI (model Absolute Reality 1.6)

Other examples created with Midjourney


Prompt: Photo of girls playing football
Midjourney

Canva

Dalle-2

Leonardo AI (model Absolute Reality 1.6)

Other examples created in Midjourney

If you're thinking of writing a story for your students, or encouraging them to write one for you, AI can be a useful tool. It can produce impressive illustrations that can be displayed in your classroom or compiled into a storybook.
Another interesting use of AI is turning children's drawings into different types of artwork. By uploading a photo of their drawing, you can get varied artistic interpretations. However, it's important to approach this carefully. We don't want kids to feel that their original work isn't good enough. Instead, the goal is to show them how AI can expand on their ideas, possibly helping them design a book or a computer game based on their original concepts.


Prompt: Illustration of a fairy village
Midjourney

Canva

Dalle-2

Leonardo AI

Other examples created in Midjourney


If you work with younger students, you can now create colouring pages on any topic you like to give the students a little brain break and engage with the topic creatively.
Prompt: colouring page of a garden, simple line art
Midjourney

Canva
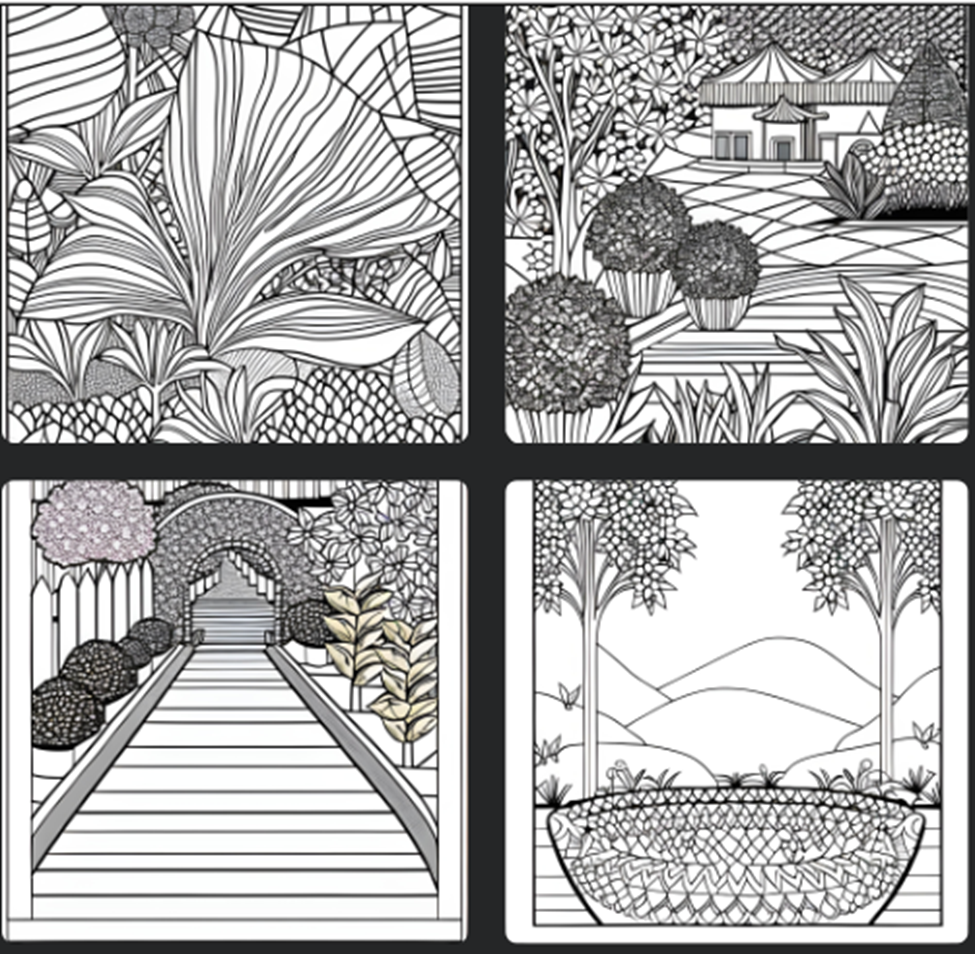
Dalle-2

Leonardo AI (model Leonardo diffusion)

Other examples created in Midjourney


Images can be a powerful tool in language lessons, serving as prompts to spark creative speaking or writing exercises. Depending on your students' level, these visuals can range from the basic, like a picture of a room, to the more imaginative, like of a magical portal. Using images in this way can engage students and stimulate a more dynamic learning experience.


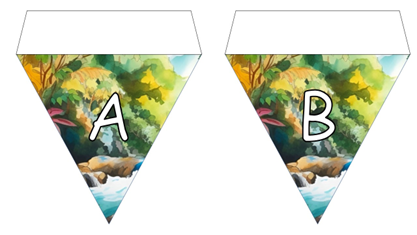
Your AI-generated images aren't limited to just lesson materials. They can be repurposed to decorate your classroom's with display board headers, vibrant posters, or as backgrounds for worksheets.

If you ever find yourself in need of inspiration for new styles or topics, remember that ChatGPT is always here to help with suggestions!
Prompt in ChatGPT: “Give me 3 image descriptions, in different art styles and of [a hamster] that would create a pleasing image. “


Conclusion
As you can see, there are many great uses of AI generated images and process itself is very entertaining and can even be a bit addictive because you never know what kind of result you get with your prompt and often you end up with something more pleasing that you would have been able to imagine.
Credits
This article was edited with ChatGPT-4


Comments